YOUR PHOTOS · YOUR MODEL · YOUR EDITABLE PLAN
Start with a room.
Let AI sketch.
Give Home studio room photos, a few instructions and measurements. Your chosen AI model suggests furniture and openings. You review the draft in the editor before applying it.
This optional feature runs through a small companion on your computer. It needs Python 3.10 or newer and either your own provider API key or a running local vision model. The ordinary online drawing editor still works without either.
1. Open your local studio
Open the latest stable release, download home-studio-VERSION.zip under Assets, and extract it. Open a terminal in the extracted home-studio folder. On macOS or Linux, run:
python3 scripts/serve-ai-planner.pyOn Windows, use py -3 scripts/serve-ai-planner.py. Open the local address printed by the command, then choose Plan from photos in the editor. Keep the terminal open while working. If the port is busy, add --port 8100.
If you already drew a plan on this website, first choose Export JSON, then open that file in the local editor. Website and local drafts have separate browser storage.
2. Choose where your photos go
Select a provider and enter an exact model ID that supports images, structured text and a context window of at least 32,768 tokens. Larger inputs may need more. Connect with your own API key, or choose a local runtime such as Ollama or LM Studio. The session remembers your key only in the companion's memory; it does not write it into your project or browser storage. Reconnect after closing the session or restarting the companion.
Cloud mode: when you generate, the companion sends your instructions, prepared photos and the relevant room context to your selected provider. Your key is sent to that provider to authenticate. A gateway also receives the request and forwards it to its model host. Provider billing and retention rules apply. Home studio operates no AI relay.
Local mode: use a vision-capable model on a loopback endpoint. Disable your runtime's cloud features if you want inference to stay on this machine. Model downloads may still need internet access.
Cloud provider setup → · Ollama, LM Studio and other local runtimes →
3. Add evidence, not guesses
Choose an existing room to furnish, or create a new rectangular room using its measured width, depth and height. Set the new room's position so it fits beside your other rooms. Add a few clear JPEG, PNG or WebP photos and explain what you want to keep or change.
For example: “The room is 4 m wide and 3 m deep. Keep the desk near the window. Put a two-seat sofa against the opposite wall. Leave the door clear.” Photos help identify objects; they do not establish accurate scale. Convert HEIC photos to JPEG first.
4. Review, apply, adjust
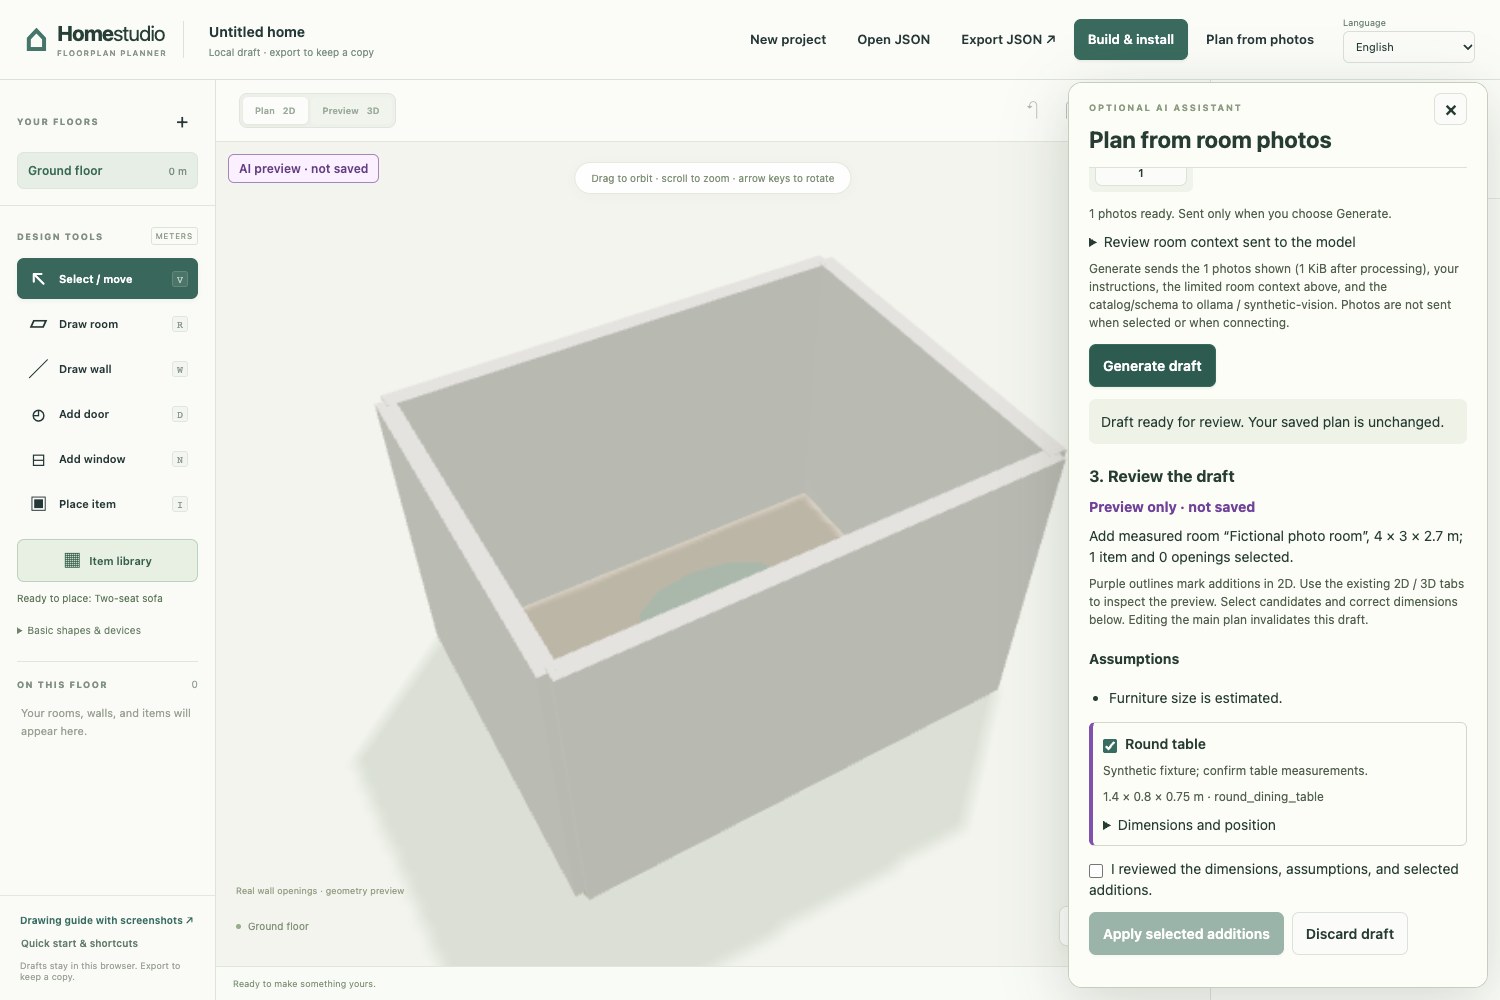
Generate a draft, check its assumptions and select the proposed items you want to keep. Preview it in 2D or 3D. Your saved project changes only when you choose Apply; the change can be undone. Unsupported objects, invalid dimensions and placements outside the room are rejected instead of silently imported.
Furnishing mode adds objects; it preserves existing furniture and walls. Move, resize or remove existing objects with the usual drawing tools. Repeat room by room. AI does not connect devices or run Home Assistant actions. When ready, build and install your plan in Home Assistant using the same project export as a hand-drawn plan.
If something does not work
- No AI button? Use the address printed by the companion, not this hosted editor or a generic file server.
- Authentication or model error? Check the provider, exact model ID, API billing and image support. A chat subscription may not include API access.
- Local connection failed? Start the runtime, load a vision model, and use its loopback address. Do not expose the companion to your network.
- Draft rejected? Supply clearer measurements or simpler instructions and generate again. Existing work remains intact.